Step-by-Step Guide to Data Masking

Bytebase Dynamic Data Masking can mask sensitive data in the query result based on the context on the fly. It helps organizations to protect sensitive data from being exposed to unauthorized users.

This tutorial will teach you how to set up and try out data masking in Bytebase within 30 mins.
Prerequisites
Before starting, make sure you have installed Docker.
Preparation
-
Make sure your Docker is running, and start the Bytebase Docker container with following command:
docker run --init \ --name bytebase \ --restart always \ --publish 5678:8080 \ --volume ~/.bytebase/data:/var/opt/bytebase \ bytebase/bytebase:2.11.1 \ --data /var/opt/bytebase \ --port 8080 -
Bytebase is running successfully in Docker, and you can visit it via
localhost:5678. Register an admin account and it will be granted theworkspace adminrole automatically. -
Go back to the Bytebase console, click Start free trial on the left bottom and upgrade to Enterprise plan.
-
Click Instances, and click Assign License. Select both instances, and click Confirm. Without doing this, the enterprise plan required for data masking won't be enabled on instances.
No Masking
Login to Bytebase,click SQL Editor, you'll be redirected to SQL Editor page. Choose (Prod) employee > public > employee, and then run SELECT * FROM employee;, you'll see the following result. Run the same query against (Test) employee, the result is the same.


Global Masking Rule
You may want to batch apply masking settings, for example, you want to mask all the birth_date columns in all the tables in the employee database. You can use Global Masking Rule to achieve this.
-
Click the Setting icon on the top right. Click Security & Policy > Data Masking. Click Global Masking Rule and then Add rule.
-
Name the rule as
birth_date should be masked, and selectColumn name,==. Fillbirth_datein the input box, and click Confirm.
-
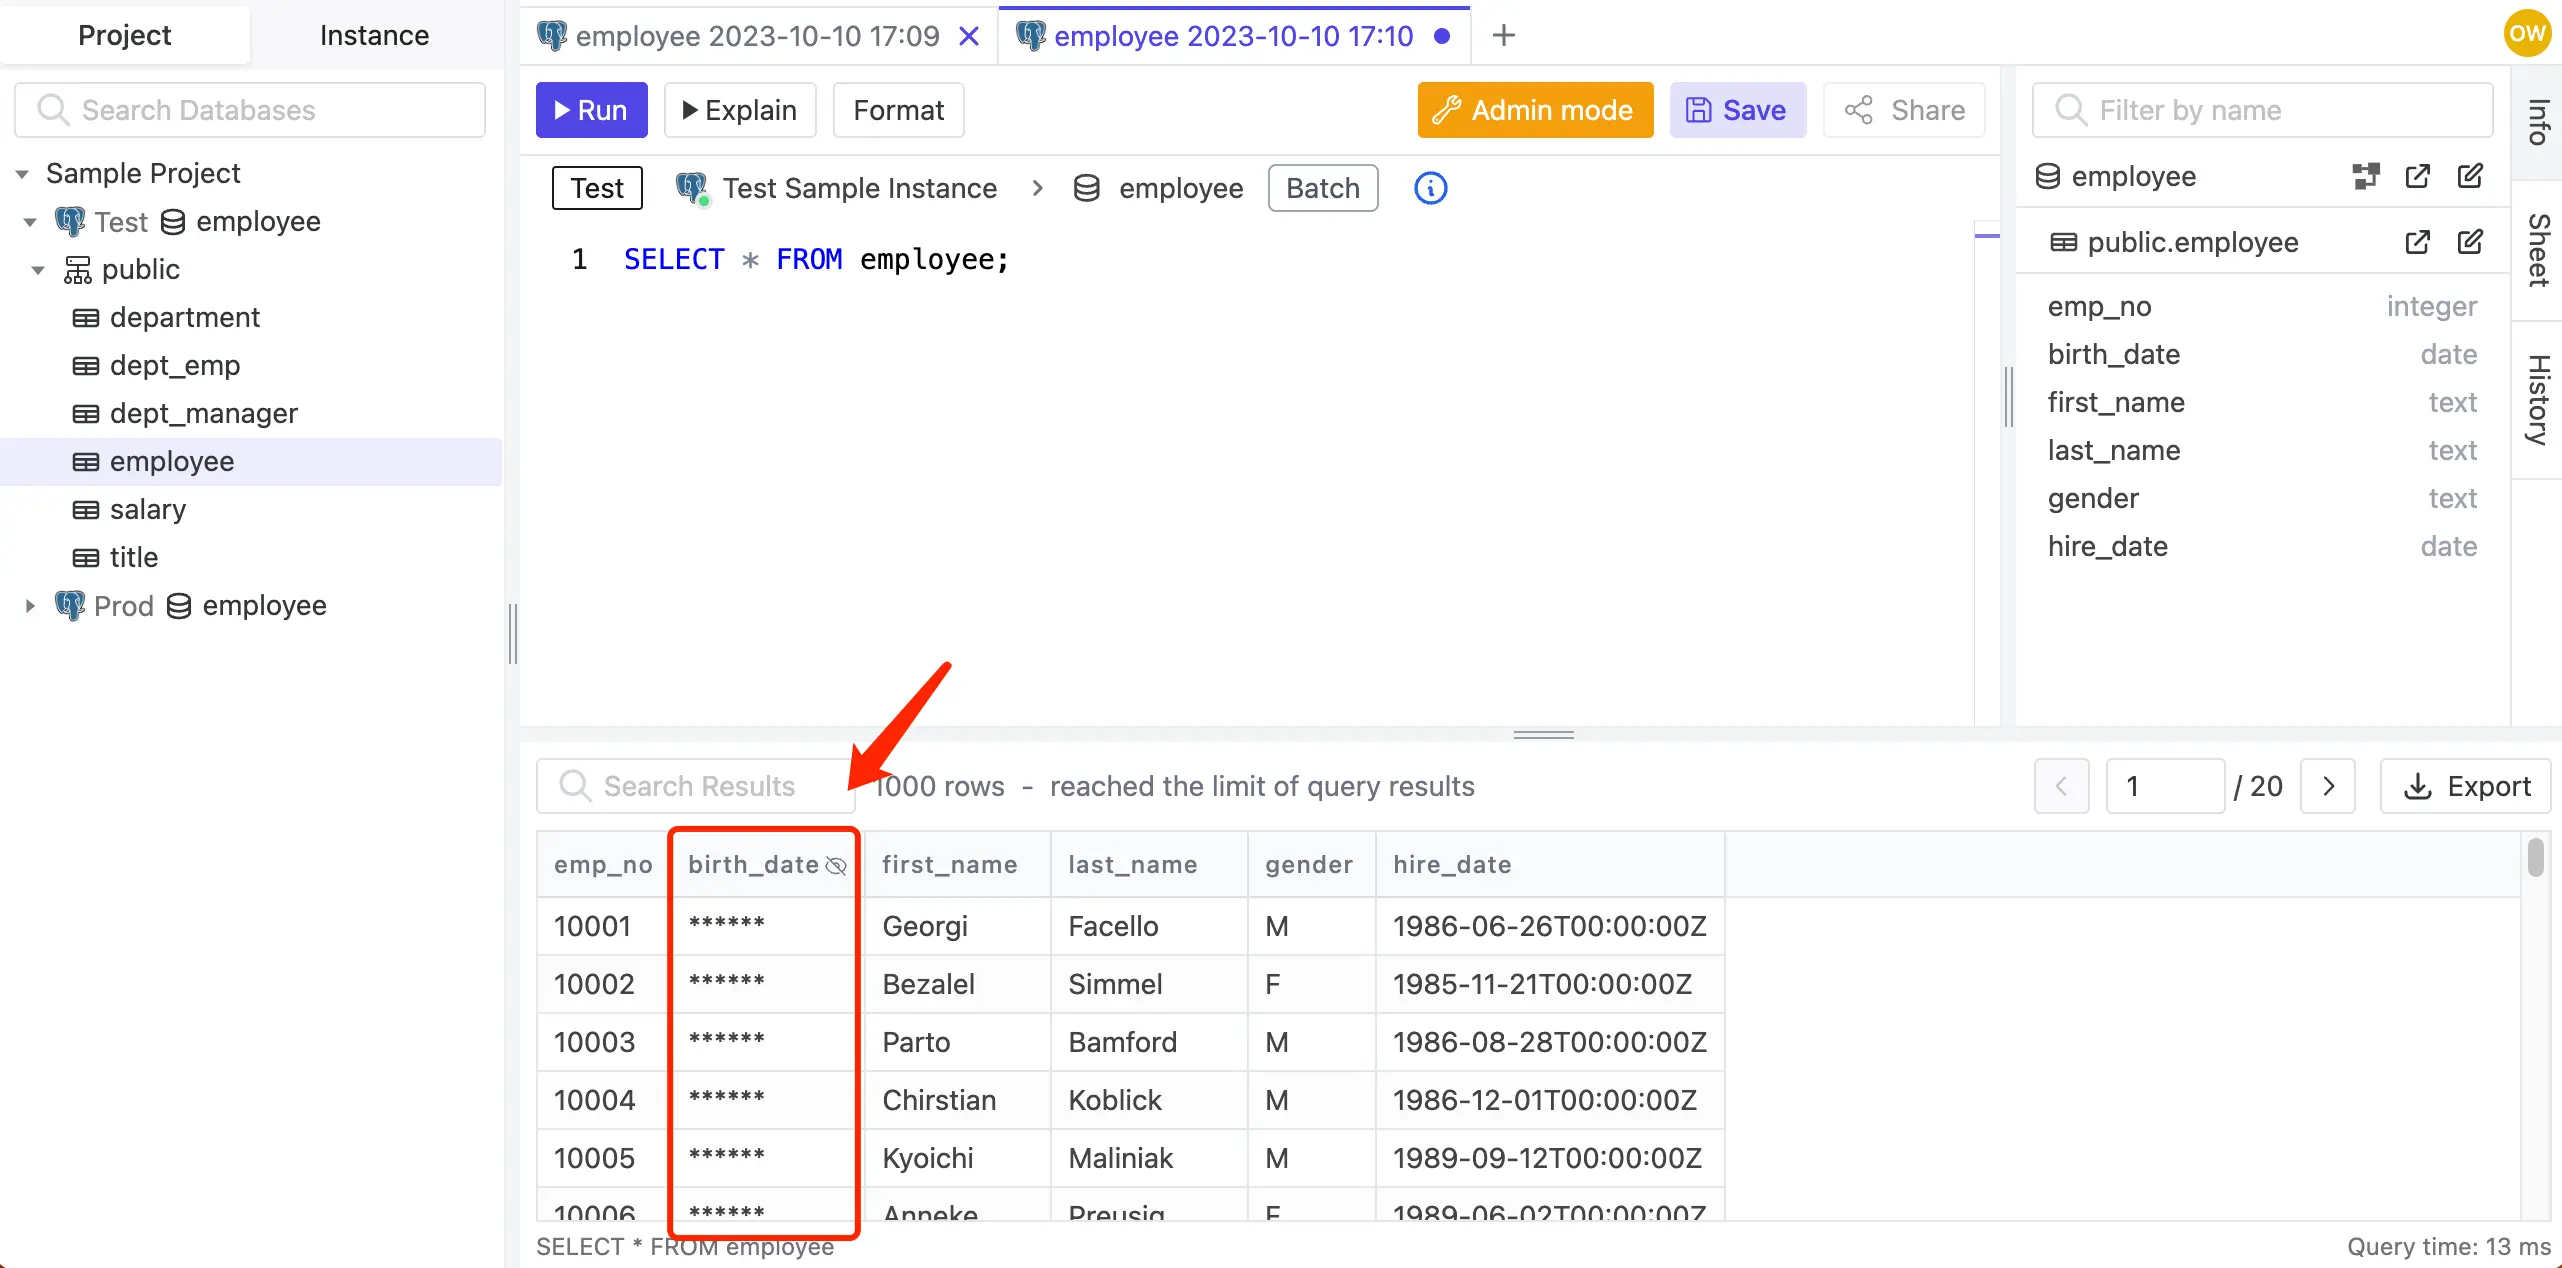
Go back to the SQL Editor page, Choose
(Prod) employee>public>employeeand runSELECT * FROM employee;again. You'll see thebirth_dateis masked. Choose(Test) employee, the result is the same.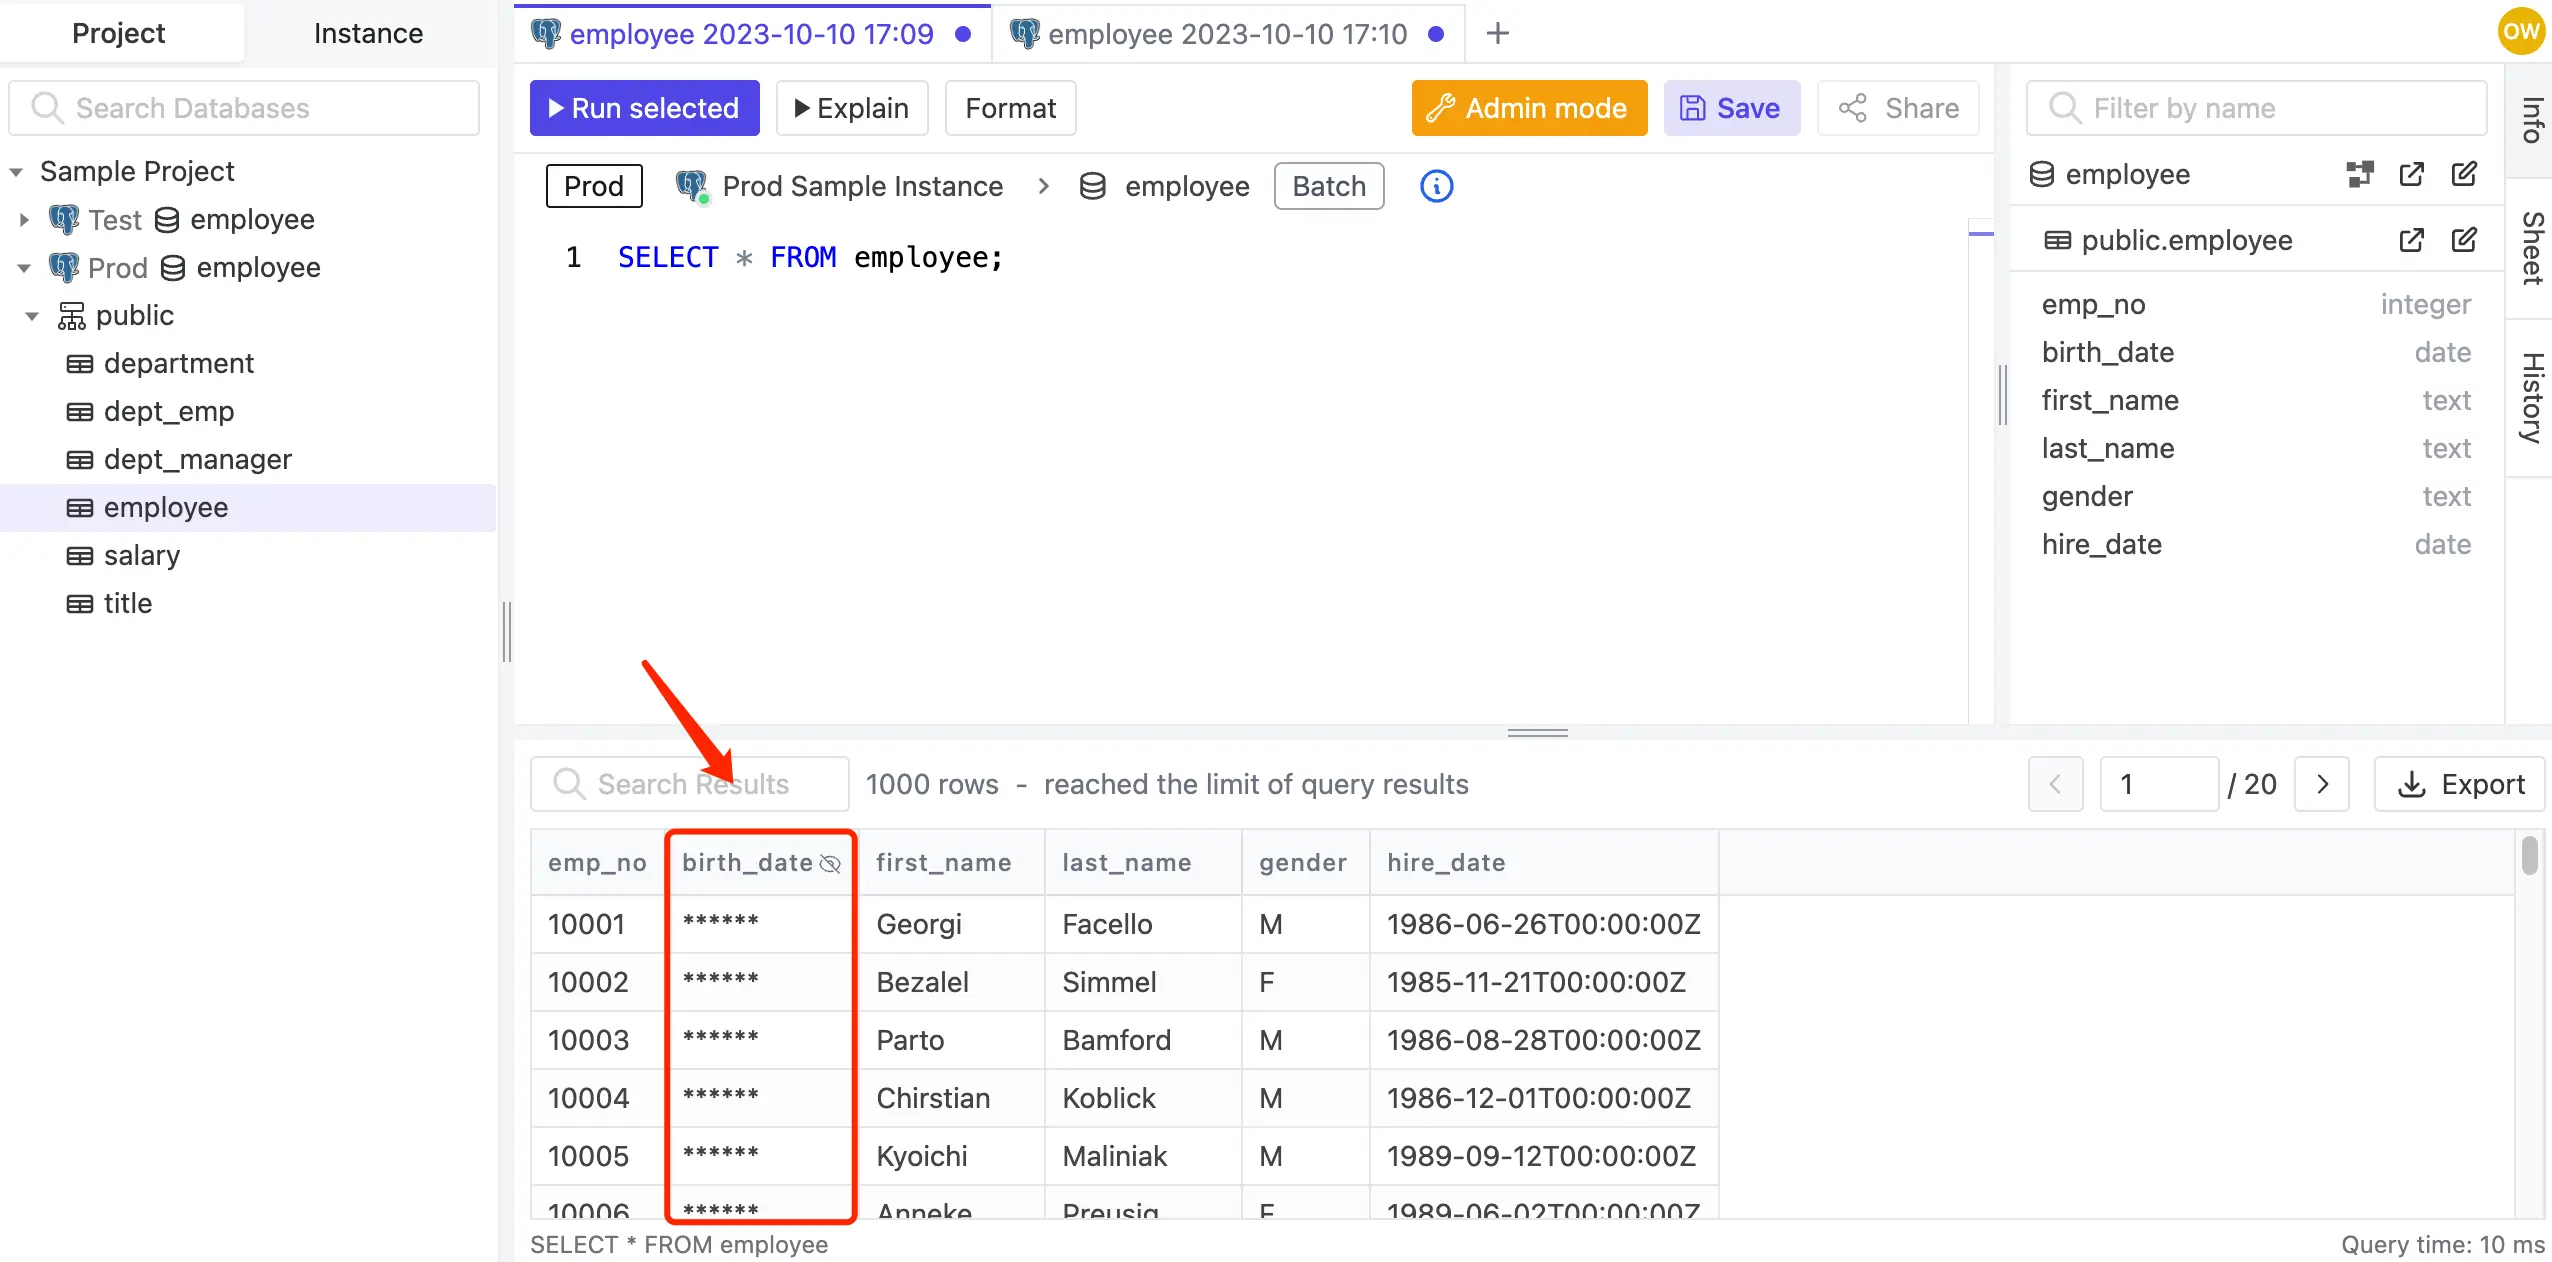
Export data with masked columns
Exported data is masked in the same way as query results.
-
Stay on the SQL Editor after querying, and click Export.

-
Fill in the export rows number, choose the format and click Confirm. The file will start downloading.

-
Open the downloaded file, you'll see the
birth_dateis masked.
Column Masking Rule
If you want to mask a specific column in a specific table, you can use Column Masking Rule.
-
Click Databases and choose
employeeonProd, and selectsalarytable. -
Click the edit(pen) icon on the
amountrow, and click Full.
-
Go back to the SQL Editor page, Choose
(Prod) employee>public>salaryand runSELECT * FROM salary;again. You'll see theamountis masked. Choose(Test) employee, it's not.

Grant unmasked access to a user
What if you want to reveal the masked data to a specific user? You can grant unmasked access.
-
Click Settings icon on the top right, and click Members. Add a
DBAuser and click + Add. Click its link in the Active members section, click Edit to set a password, click Save. -
Click Databases and choose
employeeonProd, and selectsalarytable. -
Click the edit(pen) icon on the
amountrow, and click Grant Access. Select theDBAuser, and click Confirm.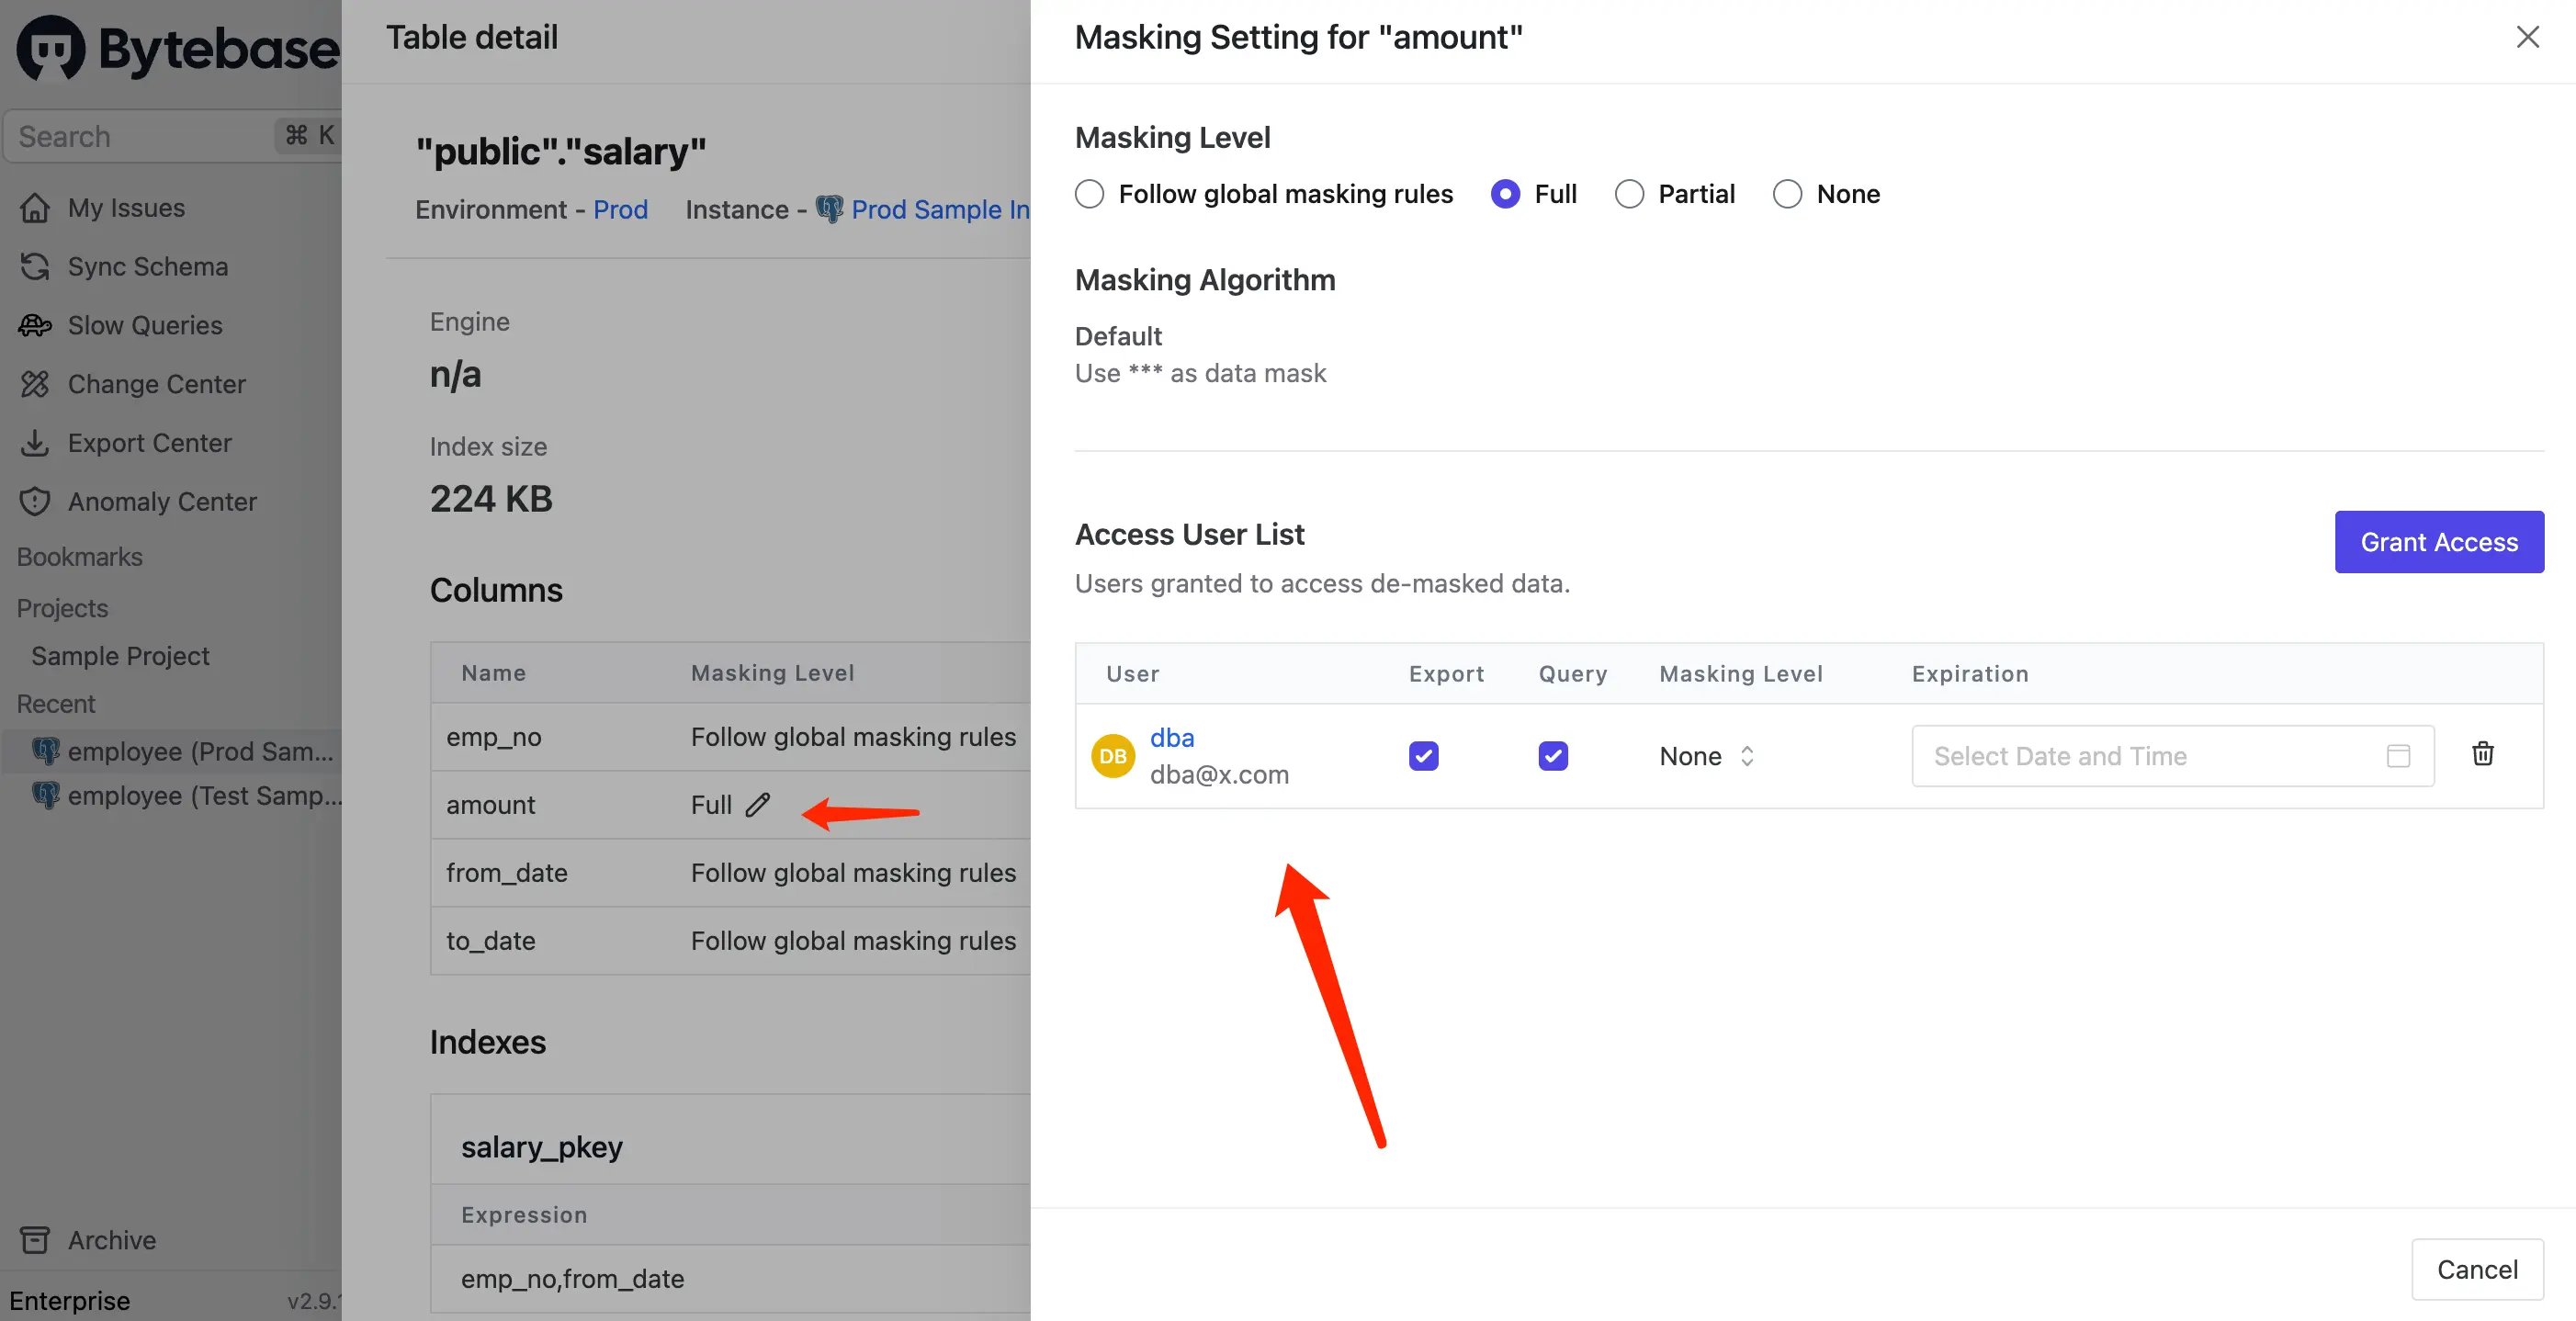
-
Login as the
DBAuser, go to SQL Editor, choose(Prod)Employee>public>salaryand runSELECT * FROM salary;again. You'll see theamountis not masked.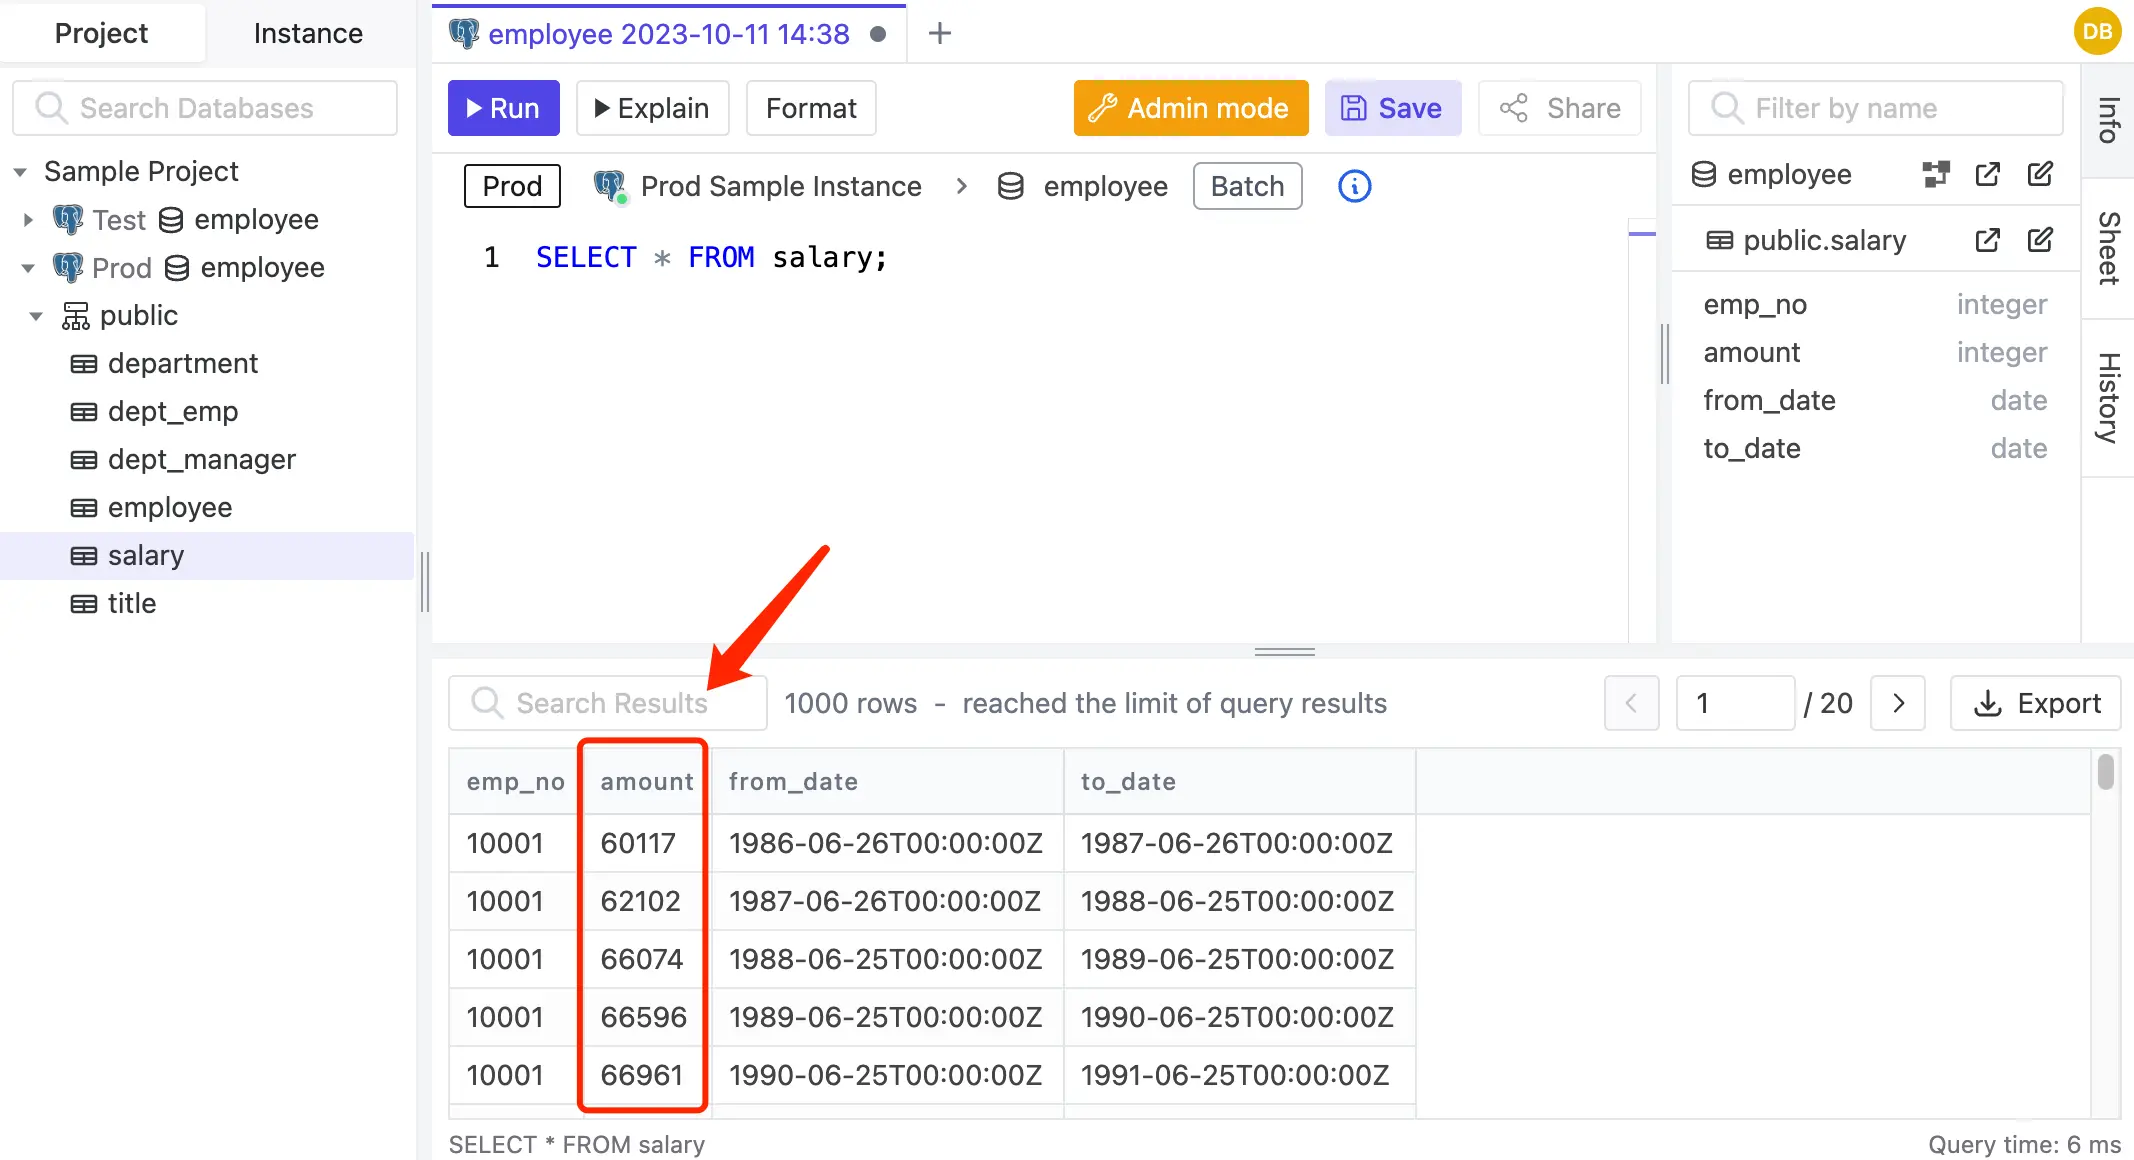
Summary
You can now mask data in Bytebase using two methods: use Global Masking Rule to batch apply masking settings, and use Column Masking Rule to mask a specific column in a specific table. You can also grant access to a specific user to reveal the masked data.
If you have any questions, please join our discord.
