Database Change Management with Spanner and GitHub
A series of articles about Database Change Management with Spanner, and is also applicable to Spanner Serverless.
- Database Change Management with Spanner
- Database Change Management with Spanner and GitHub (this one)
In the last article Database Change Management with Spanner, you have tried UI workflow in Bytebase.
This tutorial will bring your Spanner schema change to the next level by introducing the GitOps workflow, where you commit the schema change script to the GitHub repository, which will in turn trigger the schema deployment pipeline in Bytebase.
You can use Bytebase free version to finish the tutorial.
Features included
- GitOps Workflow
Prerequisites
Before you start this tutorial, make sure you have the following ready:
- Followed our previous UI-based change tutorial Database Change Management with Spanner.
- A Cloud Spanner instance.
- A GitHub account.
- A public GitHub repository, e.g
bb-test-gitops-spanner. - Docker installed locally.
- An ngrok account.
Step 1 - Run Bytebase in Docker and set the External URL generated by ngrok
ngrok is a reverse proxy tunnel, and in our case, we need it for a public network address in order to receive webhooks from VCS. ngrok we used here is for demonstration purposes. For production use, we recommend using Caddy.

-
Login to ngrok Dashboard and follow its Getting Started steps to install and configure.
-
Run ngrok:
ngrok http 5678and obtain the public URL
https://b725-103-197-71-76.ap.ngrok.io:
-
Run Bytebase in Docker with the following command:
docker run --init \ --name bytebase \ --restart always \ --publish 5678:8080 \ --volume ~/.bytebase/data:/var/opt/bytebase \ bytebase/bytebase:2.11.1 \ --data /var/opt/bytebase \ --port 8080 -
Bytebase is running successfully in Docker, and you can visit it via
localhost:5678. Register an admin account and it will be granted theworkspace adminrole automatically. -
Click the gear icon (Settings) on the top right. Click General under Workspace. Paste
https://b725-103-197-71-76.ap.ngrok.ioas External URL under Network section and click Update.
-
Bytebase is running successfully in Docker, and you can visit it via
https://b725-103-197-71-76.ap.ngrok.io.
Step 2 - Find your Spanner in Bytebase
-
Visit Bytebase Console through the browser via your ngrok URL. Log in using your account created from the previous tutorial.
-
If you followed the previous tutorial, you should see that the project and database created are still in your workspace.
Step 3 - Connect Bytebase with GitHub.com
-
Click Settings on the top bar, and then click Workspace > GitOps. Choose GitHub.com and click Next.
-
Follow the instructions within STEP 2, and in this tutorial, we will use a personal account instead of an organization account. The configuration is similar.
-
Go to your GitHub account. Click your avatar on the top right, and then click Settings on the dropdown menu.
-
Click Developer Settings at the bottom of the left sidebar. Click OAuth Apps, and add a New OAuth App.
-
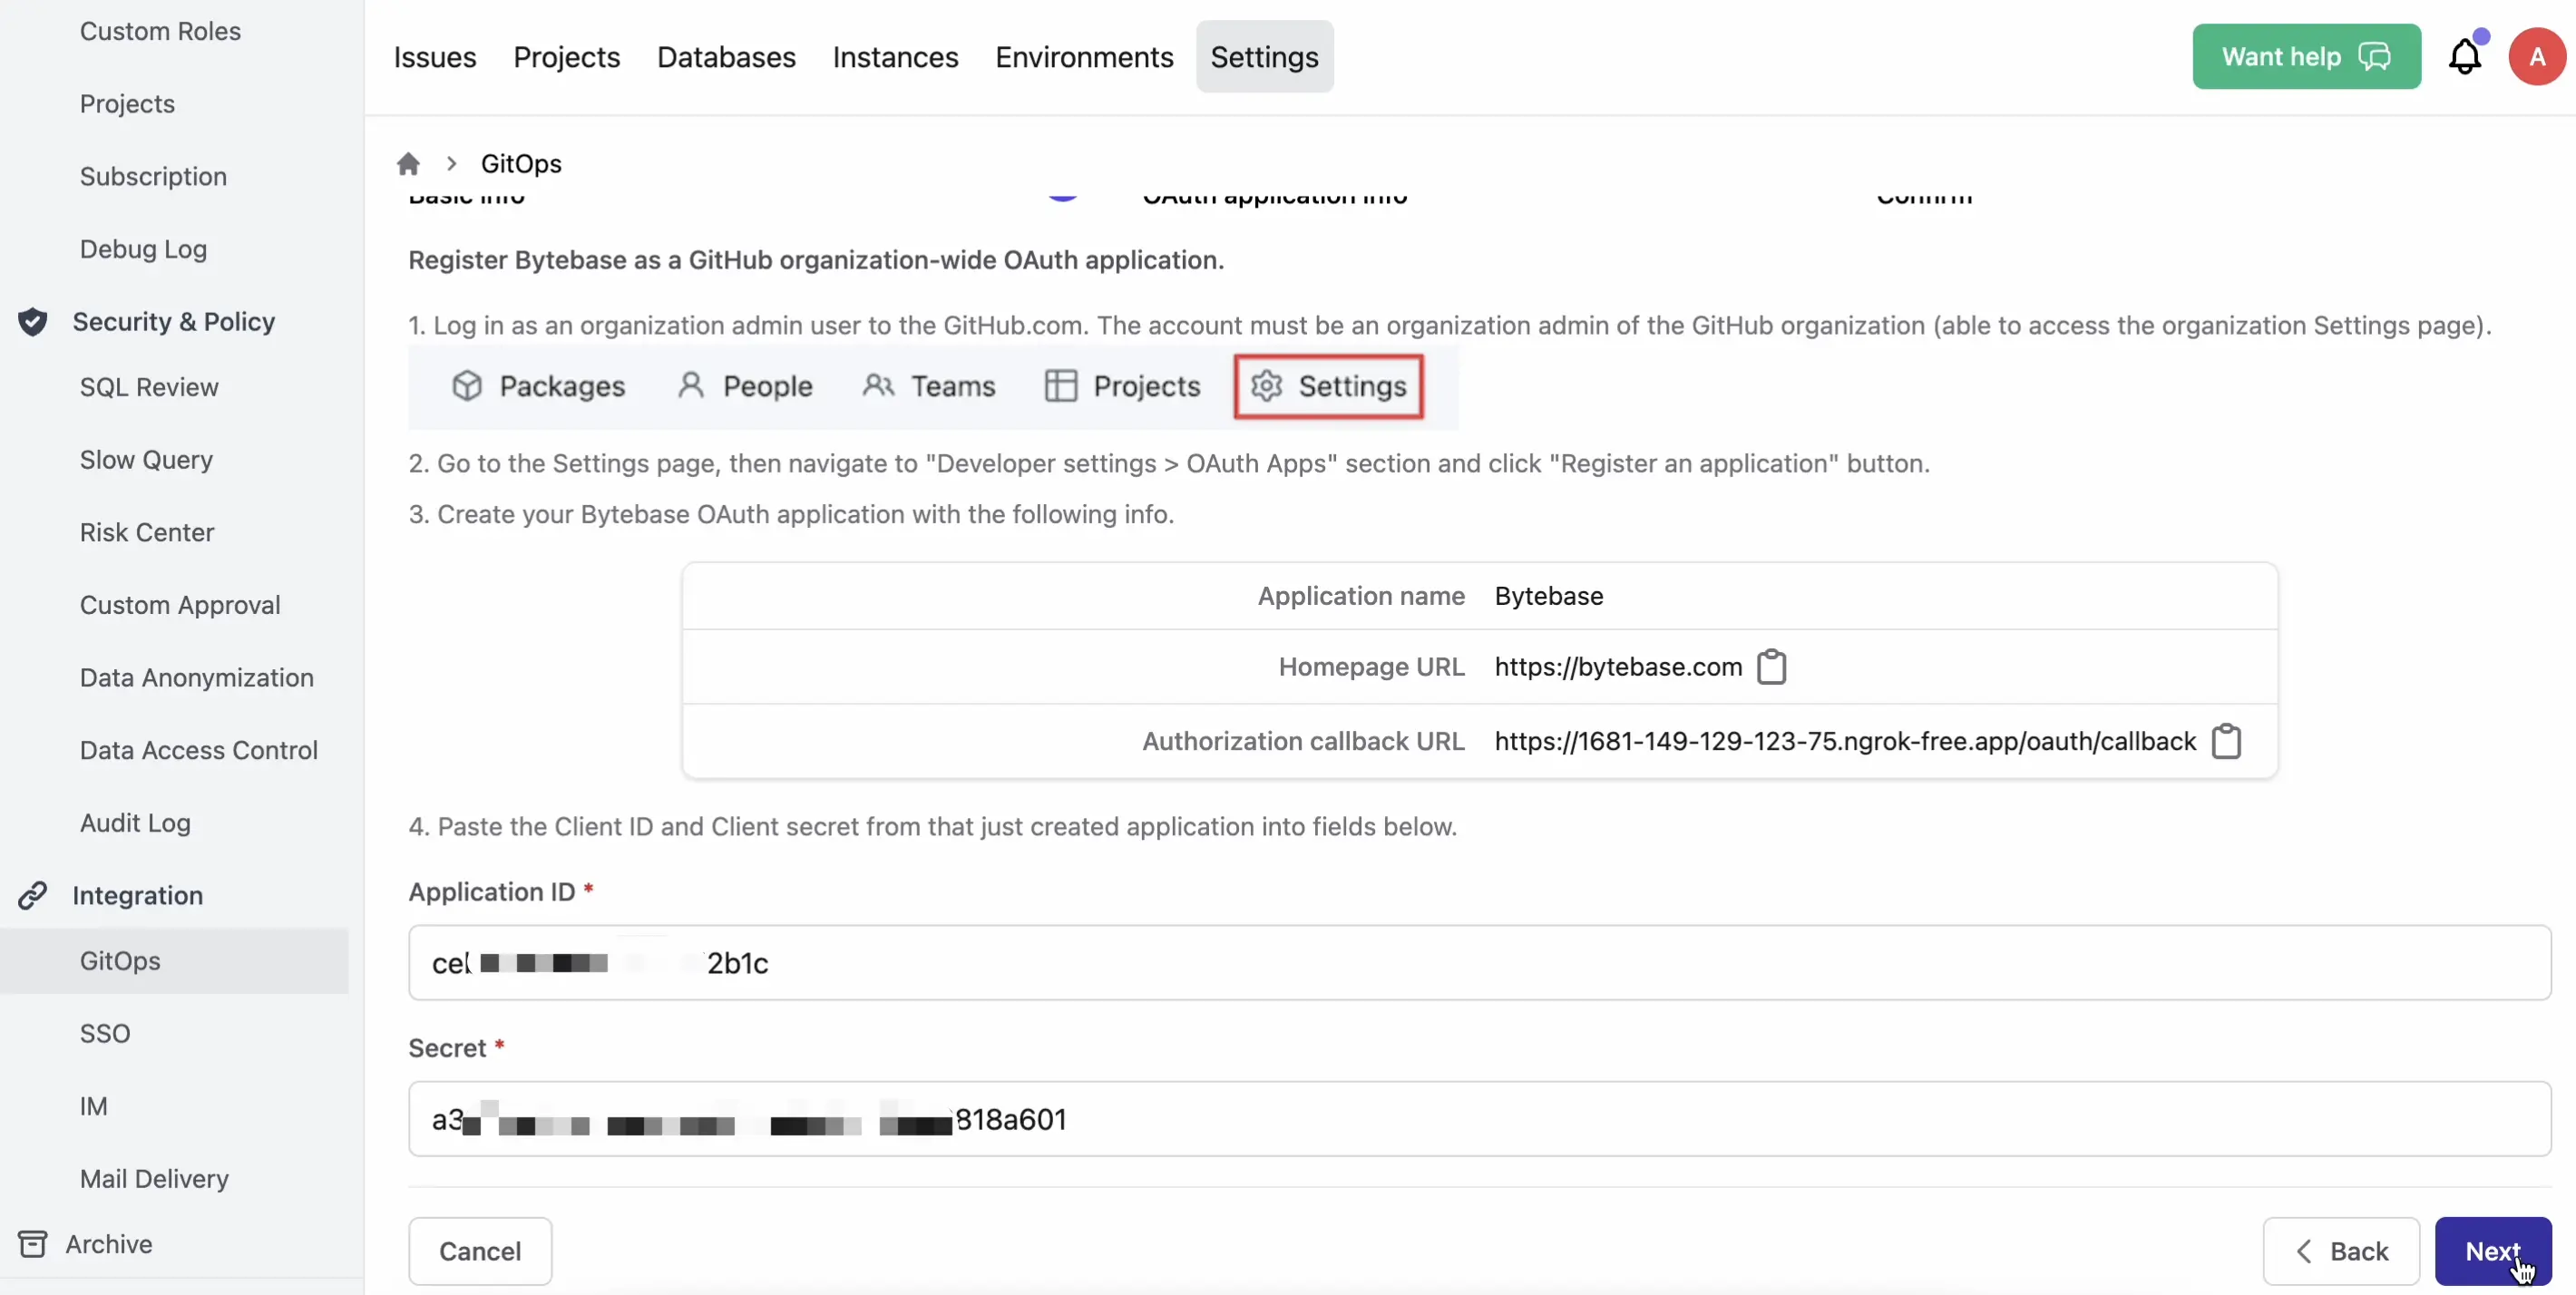
Fill Application name and then copy the Homepage and Authorization callback URL in Bytebase and fill them. Click Register application.
-
After the OAuth application is created, click Generate a new client secret.
-
Go back to Bytebase. Copy the Client ID and the newly generated Client Secret, paste them back into Bytebase's Application ID and Secret.
- Click Next. You will be redirected to the confirmation page. Click Confirm and add, and the Git provider is successfully added.
Step 4 - Enable GitOps Workflow with Spanner
-
Click Projects on the top bar and click New Project. Name it
Demo GitOpsand click Create. -
Go to the project
Demo GitOpsand click Transfer in DB. Choosetest_dbfrom projectDemo UI. -
Click GitOps, and choose GitOps Workflow. Click Configure GitOps.
-
Choose
GitHub.com- the provider you just added. It will display all the repositories you can manipulate. Choosebb-test-gitops-spanner. -
Keep the default setting, and click Finish.
Step 5 - Change schema for Spanner by pushing SQL schema change files to GitHub
-
In your GitHub repository
bb-test-gitops-spanner, create a folderbytebase, then create a subfoldertest, and create a SQL file using the naming convention{{ENV_ID}}/{{DB_NAME}}##{{VERSION}}##{{TYPE}}##{{DESCRIPTION}}.sql. It is the default configuration for the file path template setting under projectDemo GitOps> GitOps.test/test_db##202305090000##dml##add_bella.sqltestcorresponds to{{ENV_ID}}test_dbcorresponds to{{DB_NAME}}202305090000corresponds to{{VERSION}}dmlcorresponds to{{TYPE}}add_bellacorresponds to{{DESCRIPTION}}
Paste the sql script in it.
CREATE t1 (Id, Name) VALUES (2,'Bella'); -
Commit and push this file.
-
Go to Bytebase, and go into project
Demo GitOps. You’ll find there is a newPush Eventand a newissue 107created.
-
Click
issue/107and go to the issue page. The issue isDone. You’ll see:- The issue is created via GitHub.com
- The issue is executed without approval because it’s on
Testenvironment where manual approval is skipped by default. The Assignee isBytebase, because the execution is automatic, and requires no manual approval. - The SQL is exactly the one we have committed to the GitHub repository.
- The Creator is
A, because the GitHub user you use to commit the change has the same email address found in the Bytebase member list.
-
Click View change, you can view the schema diff.
Summary and What's Next
Now that you have tried the GitOps workflow, which stores your Spanner schema in GitHub and triggers the change upon committing change to the repository, to bring your Spanner change workflow to the next level of Database DevOps - Database as Code.
You can check out GitOps docs to learn more configuration details.
In the real world, you might have separated feature and main branches corresponding to your development and production environment, you can check out GitOps with Feature Branch Workflow to learn the setup. Have a try and look forward to your feedback!
