How to Manage Data Access for Developers

When you have a team of developers, it is critical to restrict their access to data to only what they need to do their job. This ensures to protect sensitive data and prevent unauthorized access.
Bytebase provides several powerful features to help you achieve this:
- You can restrict users to only view data in a specific environment.
- Developer can require approval to access a specific table.
- You can mask sensitive data, such as salary.
- You can track who has accessed which data.
- You can add watermarks to your data to deter unauthorized copying.
This tutorial will walk you through how to use these features in Bytebase.
All are Enterprise Plan only features. However, you can start a 14-day trial of the Enterprise Plan with one click without providing additional information (no credit card required).
Preparation
Make sure you have Docker installed, and if you don’t have important existing Bytebase data locally, you can start over from scratch by rm -rf ~/.bytebase/data.
You’ll need two Bytebase accounts – one Owner and one Developer.
- Owner is the one who configures the settings.
- Developer is the one who should only see information based on the configuration.
Step 1 - Run Bytebase via Docker
-
Make sure your docker daemon is running, and then start the Bytebase docker container by typing the following command in the terminal.
docker run --init \
  --name bytebase \
  --restart always \
  --publish 5678:8080 \
  --volume ~/.bytebase/data:/var/opt/bytebase \
  bytebase/bytebase:2.11.1 \
  --data /var/opt/bytebase \
  --port 8080
Step 2 - Register accounts Owner and Developer
- Visit
localhost:5678in the browser. Register an admin account, we’ll refer to it as Owner. This account will be grantedWorkspace Adminrole. To keep it simple, we use this Owner instead of registerating another DBA in this tutorial. Check Roles and Permissions.

- Log out and register another account.

-
Switch back to Owner, now you can see there's a
Sample Projectwith two embedded databases both namedemployeemapping toTestandProdenvironments respectively.
-
Click Members and Grant Access to add Developer as
Developer. Only after this, can he see the project.
Step 3 - Start Enterprise Plan trial and assign license to instances
-
Click Start free trial on the left bottom. Click Start 14 days trial (no credit card required).
-
Click Instances on the top navigation bar. You can see there are two instances. Click them one by one, and turn on Assign License for both. You may check Manage License for more details.

Data Access Control - Query Data
Log in as Developer, and you can see Sample Project. Click SQL Editor on the left bar. Within SQL Editor, you can't see anything. It's because you don't have any database access permission yet.

Step 1 - Developer can skip approvals to query data
-
Log in as Owner, and go to Settings > Data Access Control. Check
Skip approvalfor Query Data inTestenvironment.
-
Log in as Developer and go into SQL Editor again. Now you can see database under
Testenvironment. Select(Prod)employee, inputSELECT * FROM salary;and run and you can see the result. Changesalaryto any other tables and run, you can see data as well.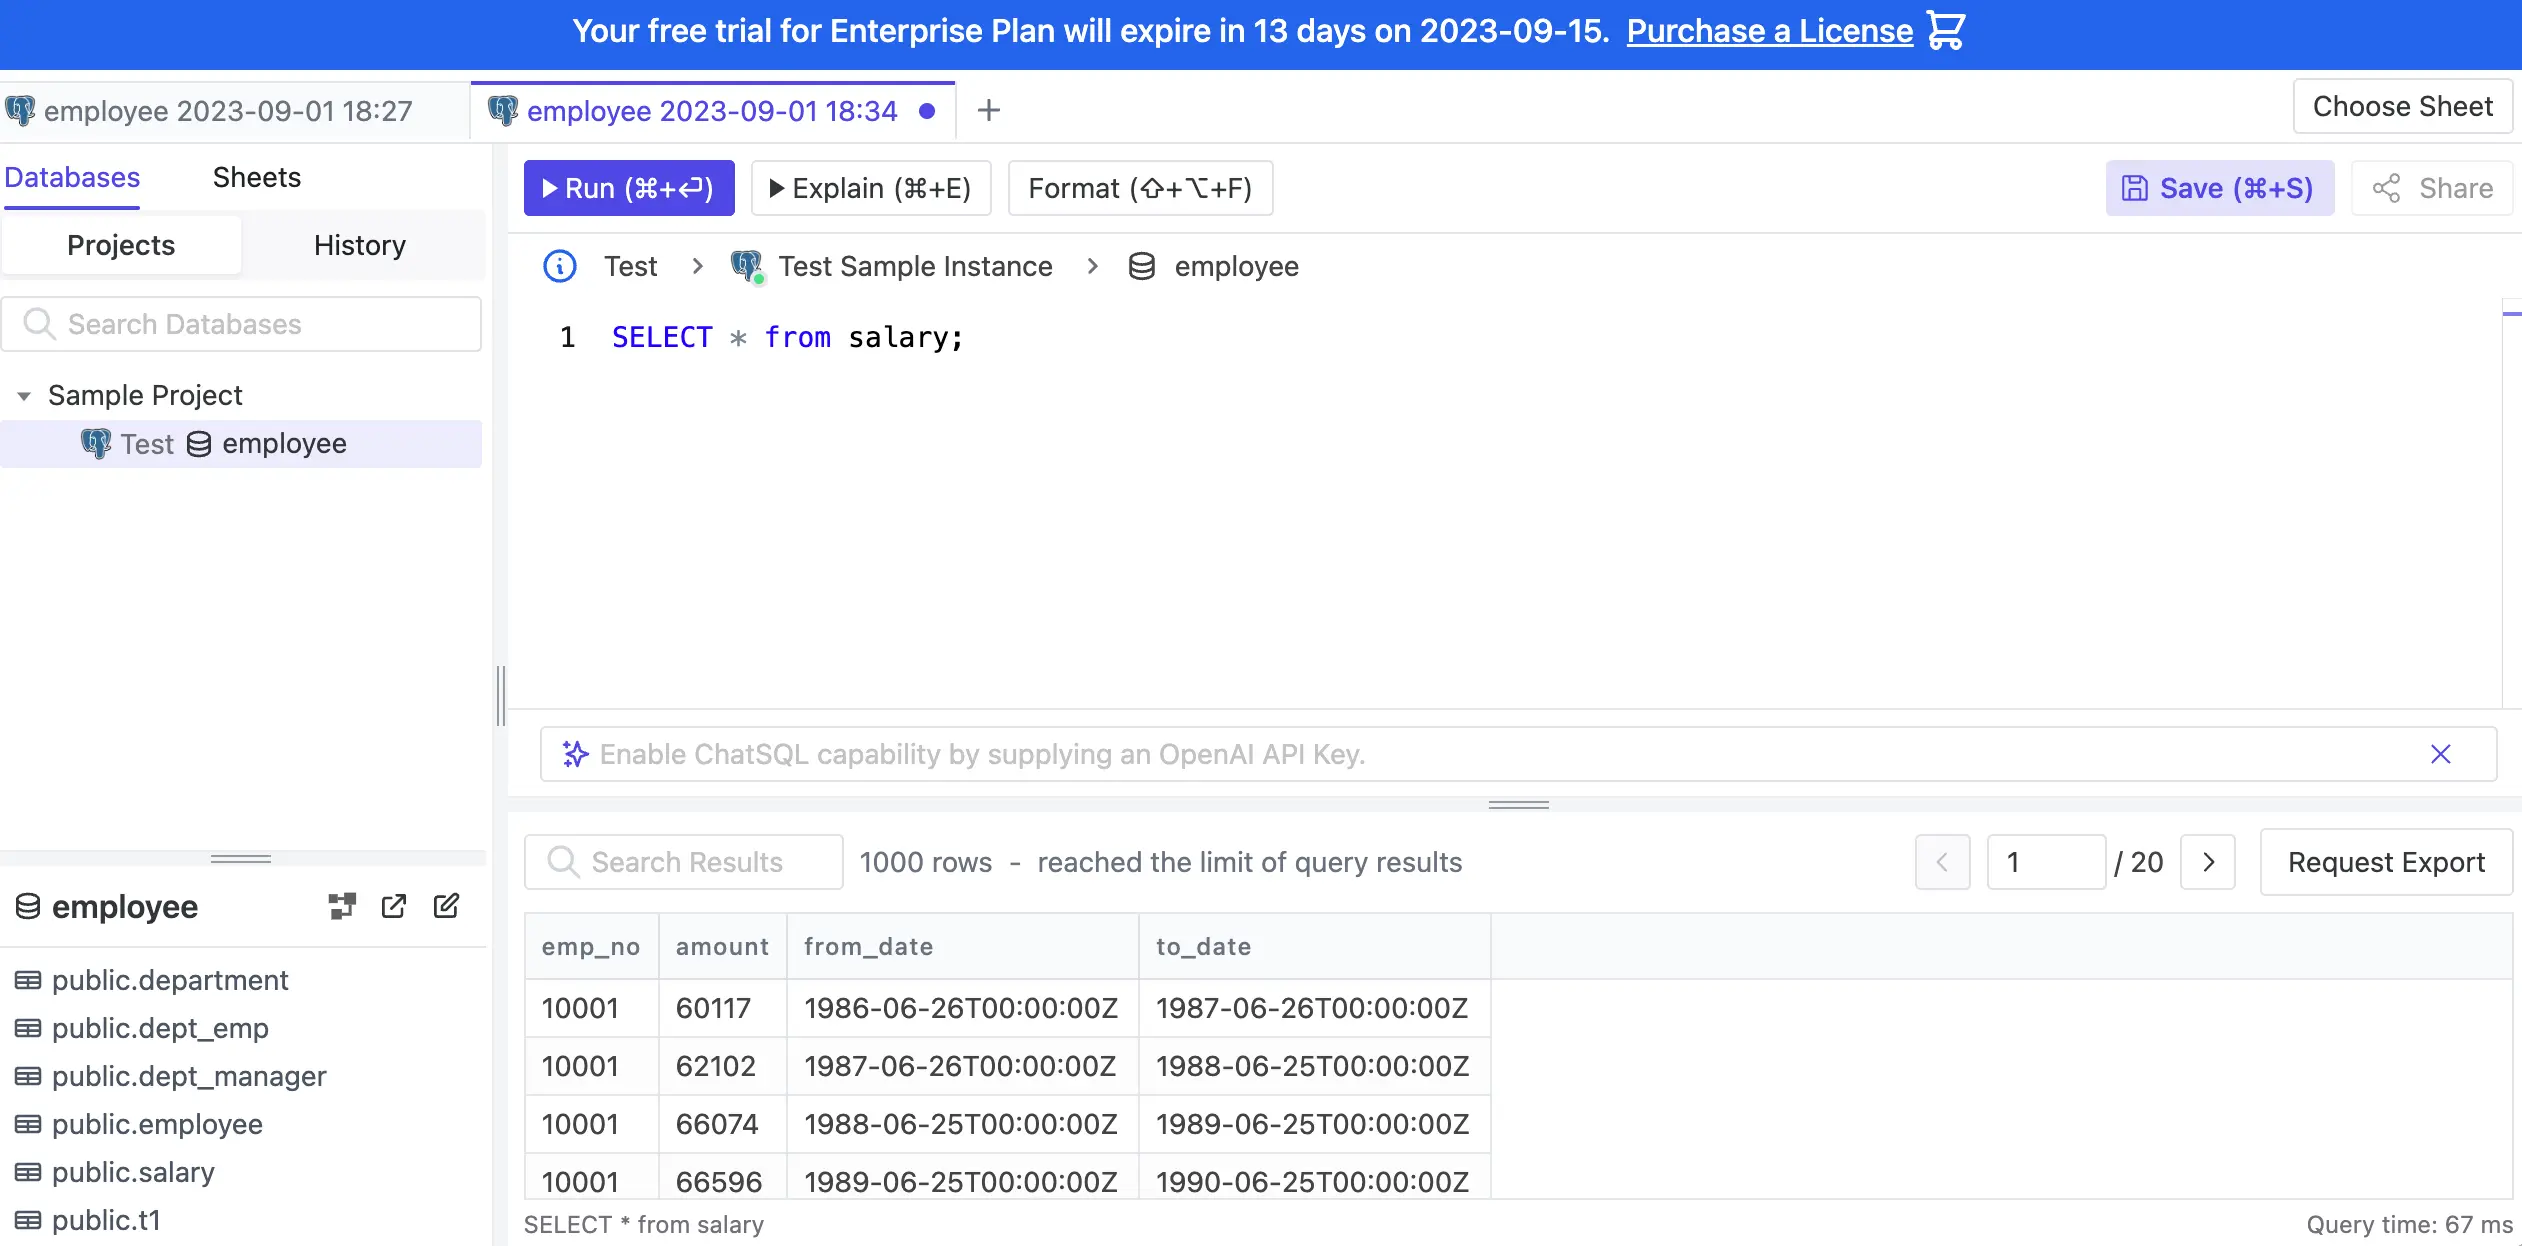
Step 2 - Developer can request to query data
In practice, developers can access any database on Test environment, but they need to obtain permission to access Prod environment. In this step, we'll show you how to implement this.
-
Log in as Owner, and go to Settings > Custom Approval. Scroll down to Request Query, and choose
Workspace Adminas Approval flow. -
Go to Settings > Risk Center. Click Add Rule. Choose
Request Queryas Type. ChooseHighas Risk. Click Load for the first template on the right. Click Add.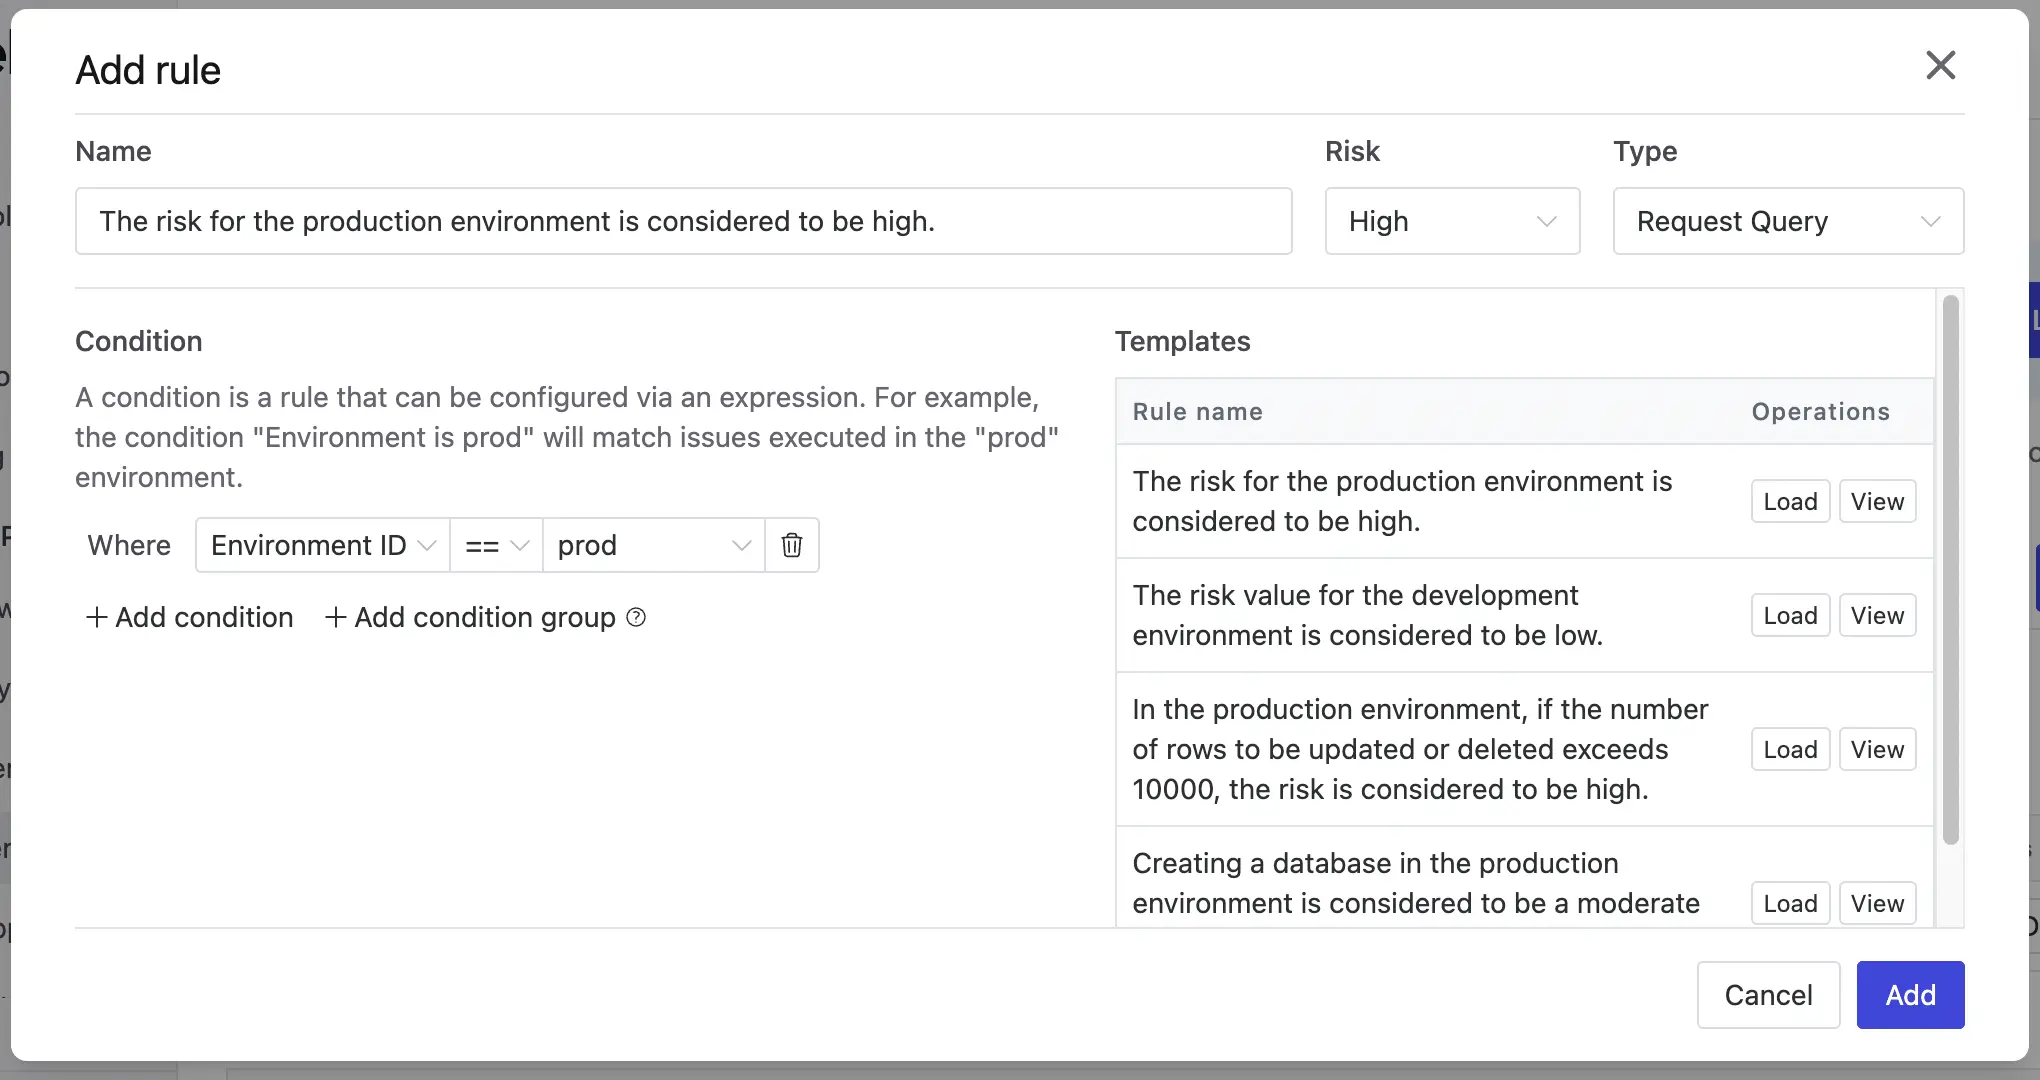
-
Log in as Developer, and go to
Sample Project, click Request Query. Choose Manual select and thenemployeetable underProdenvironment. Click OK.
-
A request issue is created with the approval flow
Workspace Adminwe just defined.
-
Log in as Owner, go to this issue and click Approve.
-
Log in as Developer, and go to SQL Editor. You can see
salarytable underProdenvironment. Select(Prod)employee, inputSELECT * FROM salary;and run, you'll see the result.
-
Input
SELECT * FROM employee;and run, it'll show permission denied. You can click Request Query to request permission.
Step 3 - Owner can grant access to query data directly
- Log in as Owner, and go to
Sample Project. Click Members and then Grant Access. ChooseDeveloperand assign the roleQuerier,Allfor Databases. Click Confirm. - Log in as Developer, and go to SQL Editor. You can see all databases under
TestandProdenvironment. Select(Prod)employee, inputSELECT * FROM employee;and run, you can see the result. Changeemployeeto any other tables and run, you can see data as well.
Data Access Control - Export Data
Export Data is similar to Query Data. Developer can skip approvals, request approvals to export data or be granted Exporter role directly by Owner.

Data Masking
-
Log in as Developer, and go to SQL Editor. Select
(Prod)employee, inputSELECT * FROM salary;and run, you can see all the information. We want to mask theamountcolumn. -
Login in as Owner, click Databases on the top navigation bar and then choose
employeeunderProdenvironment. Scroll down to Tables, clicksalarytable, and checkamountrow as Sensitive.
-
Log in as Developer, and go to SQL Editor. Select
(Prod)employee, inputSELECT * FROM salary;and run, you can see theamountcolumn is masked.
Audit Log
Bytebase records everything happened within the system. You may check the audit log.
Log in as Owner, and go to Settings > Audit Log. You can see all the queries you've run.

Watermark
Bytebase provides watermark feature to help you identify the data source. You can click Settings > General, and scroll to Security to enable it.

Summary
With Bytebase, you have now tried out the basic management of data access for developers. If you want to know more about database change as well, you can check DevOps: Database Change Management with PostgreSQL.
